Understanding Vapor Barrier Installation
In the realm of home construction and maintenance, the importance of a vapor barrier can often be overlooked. A vapor barrier is an essential component of a building’s moisture control strategy, safeguarding against moisture intrusion and enhancing indoor air quality. Whether you’re constructing a new space or retrofitting an existing one, mastering Vapor Barrier Installation can facilitate a healthier and more energy-efficient home environment.
What is a Vapor Barrier?
A vapor barrier is a material designed to prevent moisture from passing through walls, ceilings, and floors. Typically made of plastic (polyethylene) or foil, vapor barriers are crucial in areas prone to dampness, such as basements, crawl spaces, and bathrooms. Their primary role is to minimize the risk of condensation that can lead to mold, mildew, and structural damage.
Benefits of Proper Installation
- Mold and Mildew Prevention: By reducing moisture buildup, vapor barriers significantly lessen the chances of mold growth, which can adversely affect health and property.
- Improved Indoor Air Quality: Damp environments foster allergens and irritants. Proper installation of vapor barriers helps create a healthier living space.
- Energy Efficiency: A well-installed vapor barrier aids insulation effectiveness by preventing drafts and minimizing energy loss.
- Structural Integrity: Protecting building materials from moisture prolongs their lifespan, ensuring stable and safe structures over time.
Common Uses in Home Construction
Vapor barriers are commonly utilized in various areas of residential construction:
- Basements: Essential for preventing moisture seepage from the ground.
- Crawl Spaces: Vital for controlling humidity levels and protecting wooden structures from rot.
- Bathrooms: Important for reducing steam and preventing condensation on walls and fixtures.
- Attics: Beneficial for preventing warm, moist air from condensing within the insulation.
Step-by-Step Vapor Barrier Installation Process
Pre-Installation Considerations
Before starting the installation of a vapor barrier, it’s crucial to evaluate the site for existing moisture problems. Look for signs such as dampness, mold growth, or water stains, which may indicate significant moisture issues that must be addressed prior. Always ensure ventilation is sufficient in the area where the vapor barrier will be installed.
Tools and Materials Needed
To successfully install a vapor barrier, gather the following tools and materials:
- Vapor barrier material (typically 6-mil plastic sheeting)
- Utility knife
- Measuring tape
- Stapler or tape for securing seams
- Adhesive or caulk
- Safety goggles and gloves
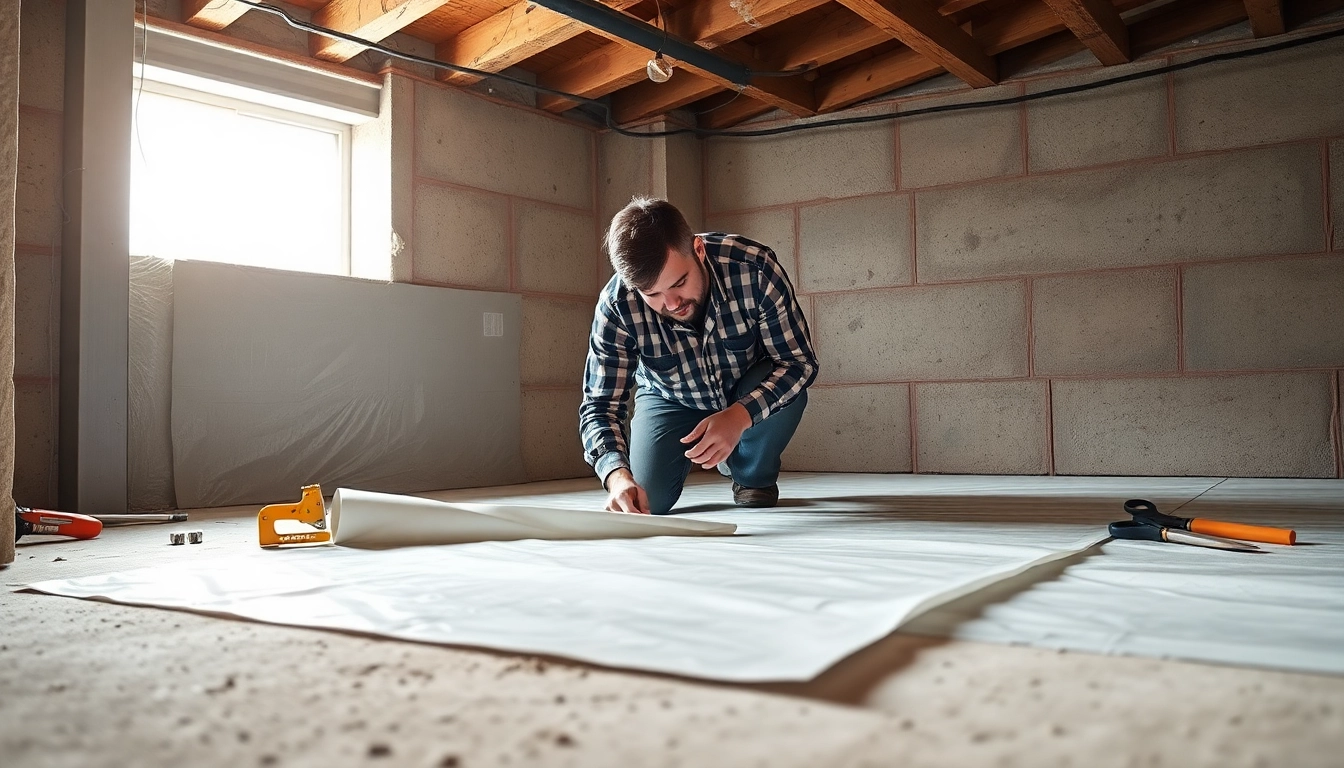
Detailed Installation Steps
Now let’s walk through the installation process step-by-step:
- Prepare the Area: Clear the installation site of any debris, standing water, or organic material that may promote mold growth.
- Measure the Space: Using a measuring tape, calculate the dimensions where the vapor barrier will be installed.
- Cut the Barrier: Cut the vapor barrier material to fit the area, allowing for overlap on edges and seams.
- Lay the Barrier: Place the vapor barrier over the ground, ensuring it extends up the foundation walls at least 12 inches.
- Seal the Seams: Use tape or adhesive to securely fasten seams and overlaps to prevent any moisture entry.
- Secure to Walls: Use a stapler or adhesive to fasten the barrier to walls, ensuring a tight seal against moisture.
- Test the Installation: Inspect your vapor barrier for any gaps or areas that may allow moisture ingress.
Choosing the Right Vapor Barrier Material
Types of Vapor Barriers
When selecting a vapor barrier, consider the following types:
- Polyethylene Sheeting: This is the most commonly used vapor barrier, effective and cost-efficient.
- Foil Vapor Barriers: Often used in attics; they reflect heat and are ideal for areas with significant temperature fluctuations.
- Spray Foam: Provides superior insulation and moisture control, though it typically requires professional installation.
Factors to Consider When Selecting Material
Choosing the right material depends on several factors:
- Thickness: A thicker barrier offers better protection, but consider the space constraints.
- Moisture Barrier Rating: Higher ratings indicate better protection against moisture penetration.
- Installation Location: Choose materials suited for the specific area of installation (e.g., ground level or walls).
Comparing Costs and Lifespan
While costs may vary significantly based on material choice, understanding the long-term investment is vital. Polyethylene sheeting is relatively inexpensive, making it ideal for straightforward installations. Foil barriers can be pricier but tend to last longer in fluctuating temperatures. Overall, consider both initial costs and potential benefits over time.
Common Challenges in Vapor Barrier Installation
Identifying Moisture Sources
A successful vapor barrier installation begins with accurately identifying moisture sources. Often, common culprits include leaking pipes, groundwater, or humidity from living spaces. Conduct a thorough inspection and rectify these sources before installing any barrier.
Overcoming Installation Errors
Common installation errors can lead to ineffective moisture control:
- Faulty Sealing: Always ensure seams and edges are securely fastened to prevent moisture penetration.
- Insufficient Coverage: Avoid gaps and minimal overlaps that can create pathways for moisture.
- Incorrect Placement: Ensure the vapor barrier is placed on the correct side of insulation to maximize its effectiveness.
Maintenance Tips for Longevity
For optimal functionality, regular inspections and maintenance are key:
- Routine Checks: Periodically inspect the vapor barrier for tears, holes, or signs of water accumulation.
- Repair Promptly: Address any damage immediately to prevent moisture issues from arising.
- Monitor Humidity Levels: Using a hygrometer can help maintain ideal indoor humidity, reinforcing your vapor barrier’s effectiveness.
FAQs About Vapor Barrier Installation
What is the best location for vapor barrier placement?
The best location for a vapor barrier is typically on the warm side of the insulation, usually above the ground in basements or crawl spaces, to prevent moisture from entering living areas.
How do I know if I need a vapor barrier?
If your home has high humidity, dampness, or you notice mold growth, especially in basements or crawl spaces, it’s advisable to install a vapor barrier.
Can I install a vapor barrier myself?
Yes, if you have basic DIY skills, you can successfully install a vapor barrier using the right materials and instructions mentioned above.
What materials are best for vapor barriers?
Polyethylene sheeting is a common choice due to its affordability and effectiveness. Foil options are preferable in humid, temperature-variable areas.
How does a vapor barrier affect home insulation?
A vapor barrier boosts insulation efficiency by preventing moisture accumulation, which can compromise insulation material, thus improving overall energy efficiency.